
DIY Oliphant Backdrop
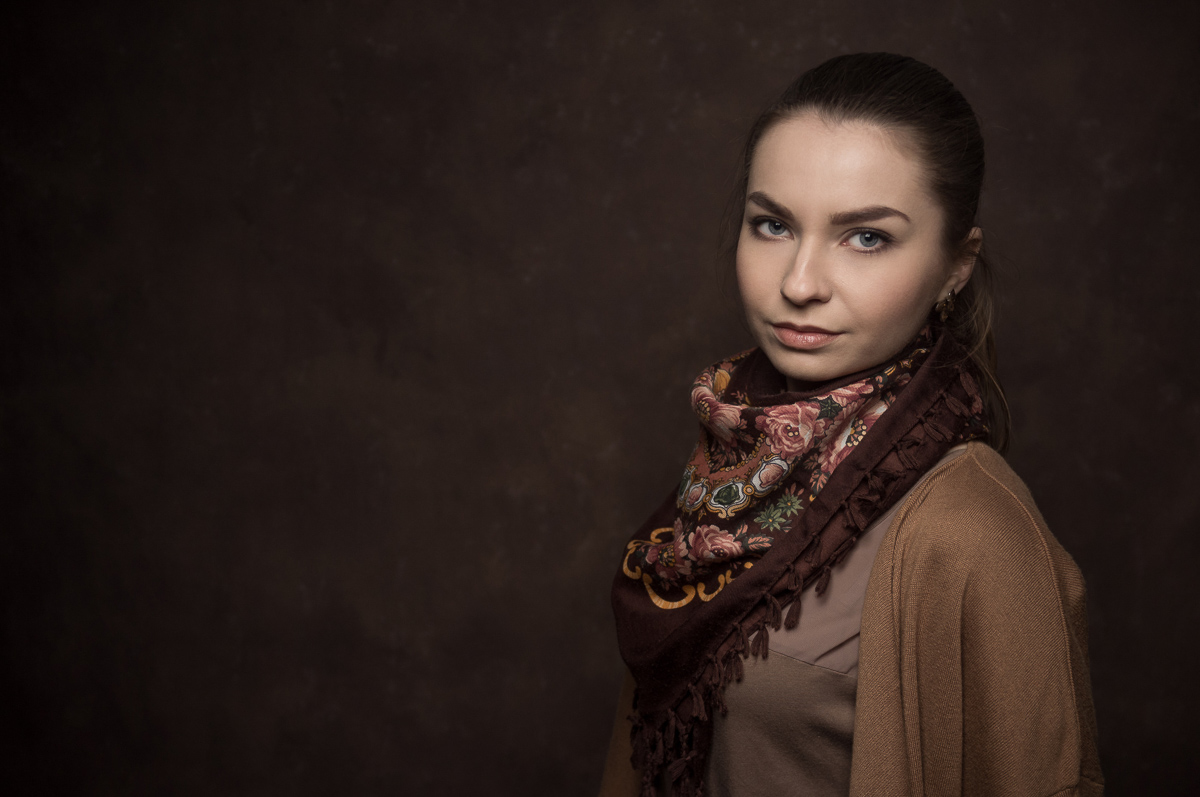
This is an English version of my original blog post on how to make your own handpainted Oliphant backdrop. I know there are many queries on the internet on how to do such a backdrop at home, and there aren't that many tutorials on the internets, so I will provide this one in the most universal language on the web :) Hopefully some of you will get something out of it and if the response is positive, I will post more English content at this address. Any feedback you can offer on this post, please send me an email at info@jacekwphoto.pl. Let's start this post with some sample pictrures shot on the backdrop itself and then, please follow the photos and description on how we created it. Also, if you've come this far, you might as well just follow me on Facebook ;).


The Process

First and foremost, you need music if you're going to spend couple of hours working :)

Also, protect your shoes if you don't have a pair to spare (rhyme intended) :)

We laid some thick gardening plastic on the ground to protect it from the paint.

We searched for various sponges in shops for creating textures.

We mostly used two brown acrylic paints for this - light brown for the base, dark brown for the texture.

Our canvas was 200x240cm white hotel bedsheet bought online

The lighter "mocca" paint was slightly diluted with water for better coverage.

We used a roller on a stick to spread the base paint on the entire canvas.

We then started covering the light base with darker tones to create the texture.

We got the best effect from a spherical sponge with wide pores, bought at a supermarket.

However, the paint applied with the sponge needed to be smudged with a big brush to make smoother transition for the edges..

Applying darker and darker tones was performed in multiple steps.

Between applications, the backdrop needed to dry a bit as well.

Slowly, the texture was built :)

Although the acrylic paint dries very quickly, we still had time to goof around :)

Mr. Rabbit and Mr. Bird paid us a visit :D

The final effect was approved and it needed to dry.

We nailed the bedsheet to the wall fot it to flaten and dry. Untortunatelly, after it dried completely, some folds appeared, like on a wet paper. It all depends on the lighting, if they show up or not... However, I bought a thick PVC pipe for the backdrop and I hope it will flaten when it will be rolled. The folds probably appeared because we did not use primer for the base (as Sarah Opliphant does), but we decided to paint directly on the material.
We are now sure that it was worth spending 3 hours just painting the backdrop, because we got out of it something that will be unique only for us. The cost of doing it was not that high, however on our Polish standards it wasn't cheep either. We spent 150PLN on it, which is roughly 50USD, and comparing to the investment that is Oplihant backdrop, it's just a fraction, but with Oliphant studios, you get the experience and the name :)
We will definatelly try to paint more backdrops like this but first we need to find more affordable materials, because the bedsheet was 1/4 of the total cost. Also, I will try to find something like 180x300cm rather than the squerish size we got now. Although, it's still nice size and can fit two people. Moreover, the painting tools we bought will stay with us, and with the next backdrop, they will not be calculated in the total cost. The only thing I will not cheep on is the paint, because it's better to spend more for the right colors than be sorry later.
Hopefully this Post will be helpful to some of you and don't forgett to drop me a line when you have a chance :)
Cheers!